Workflows
LaunchBar provides tight integration with Automator workflows, allowing you to run them from within LaunchBar, optionally pass text or file arguments, and to return the results back to LaunchBar.
Creating a new workflow
To create a new workflow you just have to create a Service workflow in Automator. LaunchBar automatically indexes all these workflows, so any workflow that you create in Automator is immediately accessible from within LaunchBar.
- Launch Automator.
- Create a new document.
- Choose “Service” as the document type.
- Specify the kind of input that your workflow shall receive from the “Service receives selected …” pop-up:

If your workflow doesn’t require any input, choose “no input”:

- Optionally, choose if your workflow service shall be available in “any application”:

or just in one particular application:

- Add some actions from Automator’s Library sidebar to your workflow.
- If your workflow generates any results, use actions like Send to LaunchBar or Display in Large Type to pass these results back to LaunchBar.
- Save the Workflow. You just have to provide a name. Automator saves Service workflows in your ~/Library/Services folder.
Running a workflow
If the workflow doesn’t require any input, just type an abbreviation of its name to select it in LaunchBar and hit Return.
Running a workflow that requires text input
If the workflow requires a text input, press Return or Space to open a text field where you can enter the text:
Alternatively, you can use Instant Send to send some text from another application to LaunchBar and then choose the workflow that shall process the sent text:
Running a workflow that requires file input
If the workflow requires a file input, select the file in LaunchBar first, then press Tab and select the desired workflow. Alternatively, send the file from Finder to LaunchBar via Instant Send, then pass it over to the workflow:
Editing an existing workflow
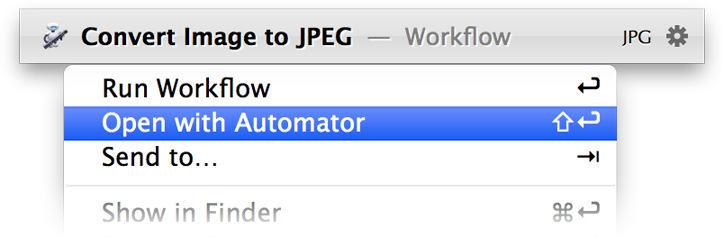
To edit an an existing workflow, select it in LaunchBar and press Shift-Return to trigger “Open with Automator” from the action menu. Alternatively you can press Tab to send the selected workflow to Automator.
Deleting an existing workflow
To delete a workflow, select it in LaunchBar and press Command-Delete to trigger Move to Trash from the action menu.
Sharing your workflows with others
If you’ve created a workflow (or a set of workflows) that you’d like to share with others, you can export them to a LaunchBar Extension file. You can then send this file via email or make it available for download. A double click on such file installs the workflows.
- Open the LaunchBar index window.
- Select the Workflows indexing rule in the sidebar.
- Switch to the Index pane.
- Select one or more workflows that you’d like to share.
- Click the Share button in the bottom-right corner of the window.

- Enter a brief description of the workflow(s), and optionally some information about the author.
Automator Actions
LaunchBar provides a set of Automator actions that are useful especially for workflows that are run from within LaunchBar.
Available Actions
- Send to LaunchBar
- Display in Large Type
- Display in Notification Center
- Paste in Frontmost Application
- Perform Action
- Perform Service
- Hide LaunchBar
- Browse
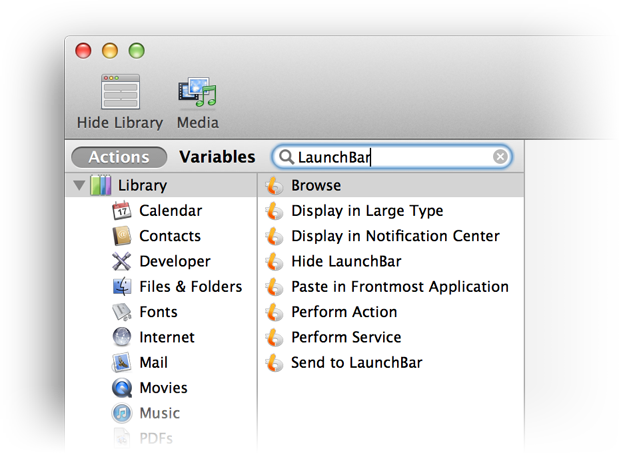
You can type “LaunchBar” in the search field of the Automator Library to get a list of all actions that are provided by LaunchBar:
Send to LaunchBar
This action can be used to pass results from the workflow back to LaunchBar. You can choose from three options how these results shall be shown in LaunchBar:
Create text item
With this option, the input is shown as text in LaunchBar, even if it could be interpreted as a file or URL.
Create single item
With this option, multiple input items are combined into a single item in LaunchBar. For example, if your workflow returns a list of file paths, LaunchBar shows them as a single item that represents all files at once.
Create list of individual items
With this option, each item from input is shown as a separate item in LaunchBar. This allows to select and open an individual item from the list.
Input is accepted in a variety of formats:
- A list of strings (or just a single string)
- A list of file paths (or just a single file path)
- A list of URLs (or just a single URL)
- A list of items in PLIST format
- A list of items in XML format
- A list of items in JSON format
The PLIST, XML and JSON formats allow you to specify detailed properties for each item, such as title, subtitle, url, path and icon.
Here’s an example of the XML format:
<?xml version='1.0'?>
<items>
<item>
<url>http://www.example.com/forecast/tomorrow</url>
<title>Weather forecast for tomorrow</title>
<subtitle>Sunny, 23 to 27°C</subtitle>
<icon>/tmp/forecast.png</icon>
</item>
<item>
<path>/tmp/some-file.txt</path>
<title>This is some text file</title>
</item>
<item>
<url>x-launchbar:perform-action?name=Display+in+Large+Type&string=Hello+World</url>
<title>Hello World</title>
<icon>com.apple.mail:attachment</icon>
</item>
</items>
Here’s the same example in JSON format:
[
    {
        "url": "http://www.example.com/forecast/tomorrow",
        "title": "Weather forecast for tomorrow",
        "subtitle": "Sunny, 23 to 27°C",
        "icon": "/tmp/forecast.png"
    },
    {
        "path": "/tmp/some-file.txt",
        "title": "This is some text file"
    },
    {
        "url": "x-launchbar:perform-action?name=Display+in+Large+Type&string=Hello+World",
        "title": "Hello World",
        "icon": "com.apple.mail:attachment"
    }
]
Display in Large Type
This action can be used if you just want to display the results of a workflow instead of sending it back to LaunchBar. You can specify an optional title, and an optional font name.
Display in Notification Center
Similar to the Display in Large Type action this action can used to display the results of a workflow in Mountain Lion’s Notification Center.
Paste in Frontmost Application
This action can be used to insert the results of your workflow directly into the document that you are currently editing.
Perform Action
This Automator action can be used to invoke an action from LaunchBar’s Actions index, just by specifying the action’s name.
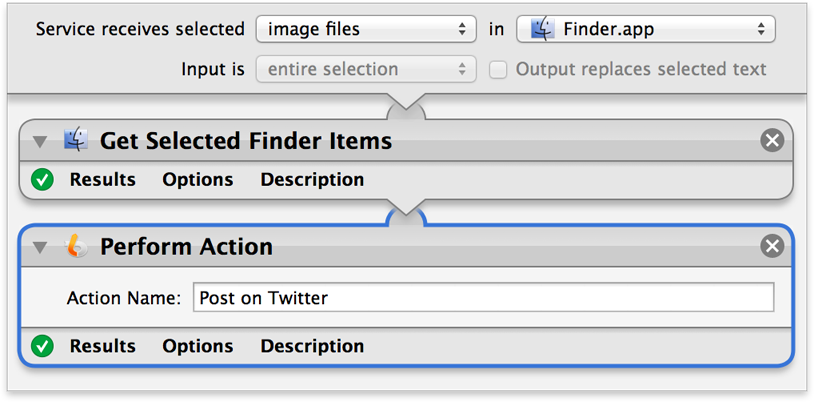
Example
Create an Automator workflow whose output is an image file. You can now add the Perform Action action to trigger LaunchBar’s “Post on Twitter” action which then posts that image on Twitter:
Perform Service
Similar to the Perform Action action this action lets you invoke any service from LaunchBar’s Services index, just by specifying the name of the Service.
Hide LaunchBar
When running an Automator workflow via LaunchBar, the LaunchBar window remains open after the workflow has completed to make sure that any results of the workflow that have been sent back to LaunchBar via Send to LaunchBar are immediately accessible.
If your workflow doesn’t return any results back to LaunchBar, you can add this action to close the LaunchBar window after the workflow has completed.
Browse
With this action the contents of the specified object can be browsed in LaunchBar. This has the same effect as when you select that object in LaunchBar and then press the Right Arrow key. The following types of objects can be browsed with this action:
- Text: Shows the specified text, separated into individual lines or words.
- File or Folder: Shows the contents of the specified folder or text file.
- Indexing Rule: Shows the items of one of the indexing rules from LaunchBar’s index. You must specify the name of the desired indexing rule.
- Category: Shows the contents of one of the categories in LaunchBar’s Categories indexing rule. You must specify the name of the desired category.
- Mounted Volumes: Shows all currently mounted volumes.
- Running Applications: Shows all applications that are currently running on your computer.